Death Squads Game Forums
Would you like to react to this message? Create an account in a few clicks or log in to continue.


The Official Community of the Fan-Made 40k Skirmish Wargame Death Squads!
 
HomeSearchLatest imagesRegisterLog in


 Tutorial: Painting rust and chipped metal on terrain

Go down 
4 posters
AuthorMessage
Narcissus

Narcissus


Posts : 973
Join date : 2010-10-15
Location : Vancouver, BC

Tutorial: Painting rust and chipped metal on terrain Empty
PostSubject: Tutorial: Painting rust and chipped metal on terrain   Tutorial: Painting rust and chipped metal on terrain I_icon_minitimeSun Dec 11, 2011 5:53 pm

This is the technique I used on a lot of my past terrain projects that I have posted here.

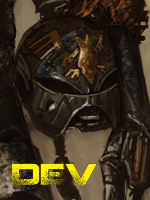
This picture shows the final effect we will achieve using this method.
Tutorial: Painting rust and chipped metal on terrain IMG_0609

Materials
I will list the materials I used here. You can substitute similar colours. The colours I used are listed in brackets.

-a sponge (I used a sponge brush and a makeup applicator, any sponge works. I often use blister pack foam. A stipple brush would also work.)
-paint brushes
-dark brown (Americana Raw Umber)
-metal (boltgun metal circa 1997)
-reddish brown (Bestial Brown)
-light orange-brown (Vomit Brown)
-brown or orange wash (Gryphonne Sepia)
-orange ink (Tamiya Clear Orange)

Tutorial: Painting rust and chipped metal on terrain IMG_0576
Tutorial: Painting rust and chipped metal on terrain IMG_0570

Procedure
I began by spray painting the whole piece using a matte grey primer. I then used my airbrush to add a little boltgun metal in the middle of the walkways to simulate wear.
Tutorial: Painting rust and chipped metal on terrain IMG_0572

1. Dark brown: Use your sponge to lightly stipple the dark brown colour in the areas where you want chips and rust. Dab the sponge into the paint and then try to get most of the paint off on some scrap paper. You want the sponge to create incomplete coverage. Dab the paint onto the surfaces using the sponge. I usually aim for about 20% coverage of a surface (change this up if you want more or less damage).
Tutorial: Painting rust and chipped metal on terrain IMG_0579

2. Metal: Use your metal colour to stipple metal inside the spots where you have already stippled the brown colour. Aim to keep most of the metal inside the brown areas to create the illusion of chips and damage. Some metal outside of the brown is fine. Be sure to leave lots of brown showing through. From this step on I used the makeup applicator as it has a smaller surface, giving more control.
Tutorial: Painting rust and chipped metal on terrain IMG_0580

3. Reddish brown: Now stipple the reddish brown (I used bestial brown) into areas where you want rust. I would recommend stippling the reddish brown over the exposed dark brown areas and lightly over some of the metal bits. You only want a little bit of reddish brown. Work with only a little paint on the sponge for this step. You can always add more later.
Tutorial: Painting rust and chipped metal on terrain IMG_0584

4. Light orange-brown: Using your light orange-brown colour (vomit brown), lightly stipple your rust highlight over the reddish brown areas. Like with the reddish brown, aim for just a light dusting in key areas. This colour really stands out. You don't need much. You are just trying to create the illusion of a little bit of corrosion and rust around the metal.
Tutorial: Painting rust and chipped metal on terrain IMG_0589

5. Brown wash: Now the fun part! Our rust and metal are mostly finished. To continue the illusion we want to create the effect of water and rust runs. Use your wash undiluted and draw vertical lines from areas with lots of corrosion. Create a variety of patterns. Large areas where washes pool, thin runs down the side, runs starting at rust, runs around rivets, etc. Try to ensure that the lines primarily go vertically, and don't slope to the side.
Tutorial: Painting rust and chipped metal on terrain IMG_0593

6. Orange ink (optional): This step is definitely optional. I really like to make the runs "pop" by highlighting them with some Tamiya Clear Orange. A second coat of Gryphonne Sepia also works. The use a detail brush and add a thin line of clear orange inside some of the rust runs. Don't overdo it. Just create a few gross and corroded areas. Then you are finished.
Tutorial: Painting rust and chipped metal on terrain IMG_0597

These are the steps I use. Obviously these steps can be modified for the colours you have and the effect you want to achieve. I have found this to be a quick and painless way to paint rust, corrosion, and exposed metal on larger terrain pieces.

Conclusion
Here are the four walkways I painted up while making this tutorial.
Tutorial: Painting rust and chipped metal on terrain IMG_0605

Here are some finished terrain pieces that used these basic steps to get the final product (click the link to see more).

Urban barricades
Tutorial: Painting rust and chipped metal on terrain IMG_0058

Waste Water Reservoir
Tutorial: Painting rust and chipped metal on terrain IMG_0158

Industrial Terrain: Pencil holder
Tutorial: Painting rust and chipped metal on terrain IMG_0053

Hope this helps anyone who is interested in painting rust and corrosion and exposed metal on their terrain. This can also be scaled and done on miniatures. Enjoy.
Back to top Go down
http://rustandthecity.blogspot.com/
Komfritten

Komfritten


Posts : 637
Join date : 2011-06-29
Age : 44
Location : Nørrebjerg Runddel, Odense, Danmark

Tutorial: Painting rust and chipped metal on terrain Empty
PostSubject: Re: Tutorial: Painting rust and chipped metal on terrain   Tutorial: Painting rust and chipped metal on terrain I_icon_minitimeMon Dec 12, 2011 3:58 am

(double post from the terrains section)

That is so great Narc! I'm not definite about the colour yet, as I really want it to be dark and gloomy, but also be "realistic" metal-effects... the dilemma

Your tutorial is really good to me, as I know better understand HOW you do it - the rest is doing it enoug! heheh

Will try to get some samples done tonight and post them - hopefully I will get results I can live with
Back to top Go down
Narcissus

Narcissus


Posts : 973
Join date : 2010-10-15
Location : Vancouver, BC

Tutorial: Painting rust and chipped metal on terrain Empty
PostSubject: Re: Tutorial: Painting rust and chipped metal on terrain   Tutorial: Painting rust and chipped metal on terrain I_icon_minitimeMon Dec 12, 2011 5:38 am

Glad you like it Komfritten. I have mainly used this on light colours as I have a great light grey primer and I find the contrast is greater with a light base colour. Post some pictures of your experiments with it and we can try to help.
Back to top Go down
http://rustandthecity.blogspot.com/
Mordheimer

Mordheimer


Posts : 9756
Join date : 2009-07-12
Age : 50
Location : Elizabeth City, NC (USA)

Tutorial: Painting rust and chipped metal on terrain Empty
PostSubject: Re: Tutorial: Painting rust and chipped metal on terrain   Tutorial: Painting rust and chipped metal on terrain I_icon_minitimeMon Dec 12, 2011 10:09 am

WOW! I think I got it... I need to try this! I think I will be painting today... yes, your tutorial is THAT good! THANKS!
Back to top Go down
http://www.DeathSquadsGame.com
Gatlag Stonetooth

Gatlag Stonetooth


Posts : 1427
Join date : 2009-07-15
Age : 45
Location : Ridderkerk, The Netherlands

Tutorial: Painting rust and chipped metal on terrain Empty
PostSubject: Re: Tutorial: Painting rust and chipped metal on terrain   Tutorial: Painting rust and chipped metal on terrain I_icon_minitimeTue Dec 13, 2011 9:09 am

Great tutorial! This will come in handy for a lot of us.
I think I can use it to improve my existing chipping technique! Smile
Back to top Go down
Sponsored content


Tutorial: Painting rust and chipped metal on terrain Empty
PostSubject: Re: Tutorial: Painting rust and chipped metal on terrain   Tutorial: Painting rust and chipped metal on terrain I_icon_minitime

Back to top Go down
 
Tutorial: Painting rust and chipped metal on terrain
Back to top 
Page 1 of 1
 Similar topics
-
» Dipping Painting Technique - Tutorial & Comments (pic heavy)
» How to make a terrain table (Tutorial)
» Terrain: Tiles,Corridors, and other printable terrain
» 40k Armies on Parade (Hopefully) Army Legion of Rust (Nurgle)
» Commissioned painting

Permissions in this forum:You cannot reply to topics in this forum
Death Squads Game Forums :: Death Squads - Community :: Tutorials-
Jump to: