Posts : 9756 Join date : 2009-07-12 Age : 50 Location : Elizabeth City, NC (USA)
Subject: Dipping Painting Technique - Tutorial & Comments (pic heavy) Wed Oct 21, 2009 12:19 am
For years I have tried to improve my painting technique from mediocre to OK. Many advance techniques still elude me, but the most 'original' of the basic was a complete mystery... until recently. This is the Dipping Technique. Basically is an 'advanced' form of wash with a varnish-based paint by submerging (dipping) the model is a 'bucket' of dark medium. The results are the same; very good (almost exceptional) table quality models done in very short time. In my search of knowledge, I wanted to answer few questions.
A. What stain medium should I use for Dipping? Dipping is the use of an obscuring agent to bring contrast in a model, usually by submerging (dipping) a model into a specially prepare medium. I have tried for more than 5 years to capture the holy grail of speed painting, dipping. No matter how much I try, I fail miserably. Some of the reasons could be the paint I get to test the technique. Tutorials are from different countries (and even different regions within USA) so I can never get the same product. Most paints I try have thick pigments and or an insane amount of varnish. I have never seen a paint made particularly for miniatures... until now! Many people swear by wood varnish, but I found a nice product specifically design for our scale models.
The Army Painter is a small enterprise in Denmark, spearheaded by two guys (who claim) to been heavily involved in the industry: Bo Penstoft (who worked for 10 years for Games Workshop, the last 6 years as their Northern European Head of Marketing) and Jonas Faering (a former Games Workshops ’Eavy Metal team master painters.) Among other trinkets (like brushes, static grass, 'army size' glue, color spray primer, etc) they sell a paint specifically designed for dipping. It is called QUICK SHADE. I recently order a can, and decided to try it.
B. What should I expect from a dipped model? As you will see, if you want a Golden Demon Award Winning model, dipping is NOT for you. You could expect a very good table quality model quickly and easy... so no reason to have a metallic or plastic grey army. So, if I could not raise a model to that level of the model's paint job... could I salvage poorly assemble models with dipping? To me this is important because I have inherited LOTS of crappy models. Not only I have to remove paint, but the remove mold lines, then prime & paint. Some of them have gaping holes (from bad clipping from sprues) and I do not intent to spend hours filling them with Green Stuff. I personally aim for a high quality paint-job, so for me to use it the result has to be superior table quality at the very least.
C. Does dipping save THAT much of time vs 'traditional' methods of painting? I have a Tyranid Army to paint. I wanna spend time with my Tyrants, Malenthrope and other 'unique' models... not with 150 Gaunts! If dipping could save me 50% of painting time, it should be worth the effort. I designed my 'traditional' method to be very quick, so it will be a challenge. Armed with half-answers I watched The Army Painter's video tutorials.
Preparing the Model
Dipping the Stain
Brushing the Stain
Mordheimer
Posts : 9756 Join date : 2009-07-12 Age : 50 Location : Elizabeth City, NC (USA)
Subject: Re: Dipping Painting Technique - Tutorial & Comments (pic heavy) Wed Oct 21, 2009 12:19 am
I asked for advice to some fellows at Tom's Boring Mordheim Forum (LINK #1, LINK #2) for some advise on the subject. Thanks Powerposey!!! Confident that even I could dip some models, I decided to start. Since I wanted to accelerate my work on my Hive Fleet Marchosias, for my test I took upon the humble Tyranid Gaunt. My basic color scheme is base green with brown carapace. The teeth and claw would be weathered bone-white and the 'muscular openings' would be a tone of red... just like my Trygon model. The plan was to...
... prime-base the gaunt Camo-Green first.
Then paint the carapace, teeth, claw & muscle with base colors. At this point, I decided to create the shading effect with multiple lines of lighter browns on the carapace.
Now the model was going for a dip in Quick Shade. I decided for dipping rather than brushing because it was a simple test and I wanted to see the viability of the stain product as recommended. Once dry, to finish it with Matte spray and flock.
I waited 4 hours for the stain to dry and applied a Matte Finish spray. MISTAKE! The model was dry to the touch, but it did not reacted well to the spray. From now on, a minimum of 12 hours will be the 'dry time' for better results.
Last item on the agenda was a simple base & flock. I used Pomez Stone paste to create the terrain, painted black and dry-brushed stone grey. Few clumps of burned static grass and voilá! Finished product!
Here are some comparisons between base coloring, dipped and finished model.
Mordheimer
Posts : 9756 Join date : 2009-07-12 Age : 50 Location : Elizabeth City, NC (USA)
Subject: Re: Dipping Painting Technique - Tutorial & Comments (pic heavy) Wed Oct 21, 2009 12:26 am
You maybe wondering... did I liked Dipping? It is a fine technique... easy to use and can elevate mediocre painters to a very intricate level, but you hit that glass ceiling VERY quickly. If you want to add fine detailing to the model, you will find the technique obtrusive at best. The technique is BEST for models that have minimal highlights and other details. Skeletons, Zombies, Ghouls are great candidates for dipping (because their lack of intricate details in clothing or armor... they tend to dress in rags) as well as Horses and other animals (the staining process gives some natural highlight to muscle & fur).
In my case, for example, if my gaunts were just green body, brown carapace and bone-white claws & teeth dipping would would works wonders. The process would highlight the muscles and other features, as well as define the carapaces and spaces between teeth. Because I have chosen to highlight the carapaces (to give a more organic look) and I have the different coloration for the musculature, the technique doesn't work as well. These details are beyond the glass ceiling and the work is almost lost in the stain. The fact that to better control the stain I have to brush it (rather than dipping them on the stain can) it forces me to 'spend' more time on each miniature. If I'm to brush the stain, I may as well use (since it takes the same amount of time):
Green Vallejo Ink for the body: will give a very natural shade of greens.
Sepia Vallejo Ink for the carapace, claws, teeth & musculature openings will look exactly as the dipped.
My Verdict If you play with an army that has been 3 months or more in bare metal or plastic grey, dipping is the technique for you! Choose 3 basic colors... and paint the models. Spend no more than 5 minutes per color per model... then when dry, deep them on Quick Shade! Wait 12 hours and spray them Matte Finish. Basic flock the models (white glue on the base and dip them in fine sand) and you will have a GREAT looking army (1,000,000 time better than bare metal!) with minimal effort. If you are a veteran painter, this technique will get you out of a jam (like having to paint 50 skeletons!) and save you time to use more traditional techniques on your important models.
What I'm going to do? I will paint & dip in Quick Shade my 32 Gaunts and 32 Hormigaunts... they base brown shading will be the visual difference between my other broods of 32 Gaunts and 32 Hormigaunts which will be inked with Vallejo Green.
DoZer
Posts : 780 Join date : 2009-07-12 Age : 38 Location : Portland, Oregon (USA)
Subject: Re: Dipping Painting Technique - Tutorial & Comments (pic heavy) Wed Oct 21, 2009 9:03 am
Wow is all I've gotta say!! When you first told me about this new dipping product I was interested to see how it would turn out as other dipping products do not produce such a "complete" look to it.
In all that looks fantastic!!!
Mordheimer
Posts : 9756 Join date : 2009-07-12 Age : 50 Location : Elizabeth City, NC (USA)
Subject: Re: Dipping Painting Technique - Tutorial & Comments (pic heavy) Wed Oct 21, 2009 9:55 am
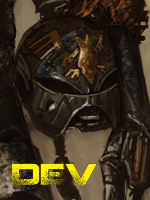
Thanks bro! For my next trick I will test a Terminator for your Deathwing! I think the technique works BEST if the model has FEW basic colors. I want to see if I can REALLY get away with painting 3 basic colors - bone-white body, metal for weapons, green for shoulder/knee pads! Few decals here and there, and he would be joining the battle.
I got until November 1st for this task.
DeafNala
Posts : 1158 Join date : 2009-07-16 Age : 76 Location : Horseshoe Bay, Texas
Subject: Re: Dipping Painting Technique - Tutorial & Comments (pic heavy) Wed Oct 21, 2009 11:37 am
My basic philosophy for painting is if it works for you THAT is the right technique. As a method of fielding a VERY presentable "gaming quality" army in a reasonable amount of time, the "Dip" technique has much to recommend itself particularly to a new painter. Miniature games are all about appearance. As such, it is not for those seeking instant gratification & unpainted minis have nothing to offer to the game. While the method WILL NOT yield an army of award winning minis, it will give you a very nice looking "gamers quality" army. SO...if you've been procrastinating about painting your Lads & Lasses, I would recomend giving this Beasty a whirl.
Mordheimer
Posts : 9756 Join date : 2009-07-12 Age : 50 Location : Elizabeth City, NC (USA)
Subject: Re: Dipping Painting Technique - Tutorial & Comments (pic heavy) Wed Oct 21, 2009 11:49 am
My sentiments exactly, Deafnala!
I see many people that enjoy collecting, putting together and converting models... only to leave them unpainted. What a shame! Their reason is that they try ONCE to paint, it was too hard and the results were horrible. Painting is like drawing... sure having talent helps, but with (lots of) practice anyone can draw something decent. Dipping will allow 'those that can't paint' to have a nice-looking army with relative ease. Maybe by seeing good results, some of the 'non-painters' can bring painted models to the table-top and complete the visual eye-candy that a fully painted game brings to the players.
For the non-painter, not having an award-winning painted army is not an issue... but I bet anything that they will feel extremely proud when fellow players come and appreciate their complete work; their conversions will be enhanced by having the models painted and knowing that they did the work will seal the deal!
DoZer
Posts : 780 Join date : 2009-07-12 Age : 38 Location : Portland, Oregon (USA)
Subject: Re: Dipping Painting Technique - Tutorial & Comments (pic heavy) Wed Oct 21, 2009 11:59 am
I can see this working VERY well with my all bone white army. More specifically on tanks!! GOD do I hate painting bone white on a tank and then having to go back and do all the shading.....it took me forever to paint on land raider!!! Dipping and spray painting a LR would definitly shave HOURS off of painting.
I'm iffy though on terminators. If you recall Mordheimer my termies are full of colors, and I'm not sure if this will detract from that or not......
Mordheimer
Posts : 9756 Join date : 2009-07-12 Age : 50 Location : Elizabeth City, NC (USA)
I used a product called Quick Shade, from The Army Painter company (link above). Since I was experimenting, I followed the videos (also on the article) to the "T"... I grabbed the model with pliers by the base, submerge it on the stain, shake it around, allowed to drip the excess back to the can... then shuck it hard (as in the video) to remove the excess. I found that it waste some stain, so is best to brush it (3rd video).
Wear gloves, do it outside and let them dry (outside) for 12 hours. The Quick Shade has a strong smell.... use in well ventilated areas.